
Spring Into Savings: Available Now at Home Depot

  • Kitchen
      Material
    • Fireclay Kitchen Sinks
    • Copper Kitchen Sinks
    • Stainless Steel Kitchen Sinks
    • View All Kitchen Sinks
    • Style
    • Farmhouse Kitchen Sinks
    • Quick-Fit® Easy DIY Sinks
    • Drop-In Kitchen Sinks
    • Undermount Kitchen Sinks
    • Bar and Prep Sinks
    • Popular
    • Cleaning & Care
    • Kitchen Sink Installation
    • All-In-One Kitchen Kits
    • #ShowUsYourSink
    • Collections
    • SinkSense® Accessories
    • Care IQ® Kits
    • Bottom Grids
    • Drains & Disposals
    • View All Accessories
    • Fireclay Durability Challenge
      Man in safety gear swinging a sledge hammer and smashing a white fireclay sink.
  • Bath
      Material
    • Copper Bath Sinks
    • Copper Bath Tubs
    • Nickel Bath Sinks
    • View All Bath Products
    • Style
    • Vessel Bath Sinks
    • Drop-In Bath Sinks
    • Undermount Bath Sinks
    • Dual Flex Bath Sinks
    • Freestanding Bath Tubs
    • Popular
    • Cleaning & Care
    • Bath Sink Installation
    • All-In-One Bath Kits
    • #ShowUsYourSink
    • Collections
    • SinkSense® Accessories
    • Care IQ® Kits
    • Bath Sink Drains
    • View All Accessories
    • Soak with Sinkology
      A hand hammered copper claw foot bath tub
  • Where To Buy
    • Shop Online
      Smiling african american woman using smartphone at home, shopping online, while relaxing on couch
    • Amazon
    • Bed, Bath & Beyond
    • The Home Depot
    • The Home Depot Canada
    • Home Hardware
    • Houzz
    • Menards
    • Lowe's
    • Wayfair
    • Find In Store
      The Home Depot® employee standing proudly in aisle wearing orange decorated smock and smiling
    • The Home Depot
    • Lowe's
    • Menards
  • About
      About Sinkology
    • Our Story
    • #ShowUsYourSink
    • Media & News
    • Partners
    • Where To Buy
    • Yearbook
    • Honor Roll
    • Resources
    • Contact
    • Warranty
    • Register Your Product
    • Show Us Your Sink
      Contemporary kitchen with black cabinets and white countertop with fireclay drop-in sink and black faucet infront of a window
  • School Of Sinkology
Popular searches
  • Fireclay Sinks
  • Copper
  • Josephine
  • Care IQ® Kits
  • Bath Drain Installation
  • Installation
  • Home
  • The Ultimate Guide to Installing Bath Sink Drains

    From Grid Drains to Push & Seal, step-by-step help for bath sink drain installation

    Copper Grid No Overflow bathroom sink drain.

    Bath Drain

    This procedure will assist you with installing the Sinkology Bath Drain.

    You Will Need:  Plumber’s Putty

    Important: Sinkology offers two styles of Bath Drains. Bath Drains that have a no-overflow design and should only be installed into bathroom sinks without overflow holes, whereas Bath Drains that have an overflow design should be installed into bathroom sinks with overflow holes.

    Download PDF Instructions

    Instructions:

    1. Remove the Lock Nut, White Plastic Washer, and Rubber Washer from the Drain Stem.
    2. Apply Plumber’s Putty on the underside of the Drain Lip.
    3. Slide the Drain into the drain hole.
    4. Wipe off any excess Plumber’s Putty. Note: The Drain and the metal of the Sink will be touching with a thin layer of Plumbers Putty creating a water tight seal around the Drain.
    5. Place the Large Steel Washer over the Drain Pipe.
    6. Slide the Rubber Washer onto the Drain Stem.
    7. Slide on the White Washer, then tighten the Lock Nut onto the threads until the Drain is secure.

    Congratulations, this completes the installation of the Sinkology Bath Drain.

    Pfister Push & Seal™ Bronze Bath Drain

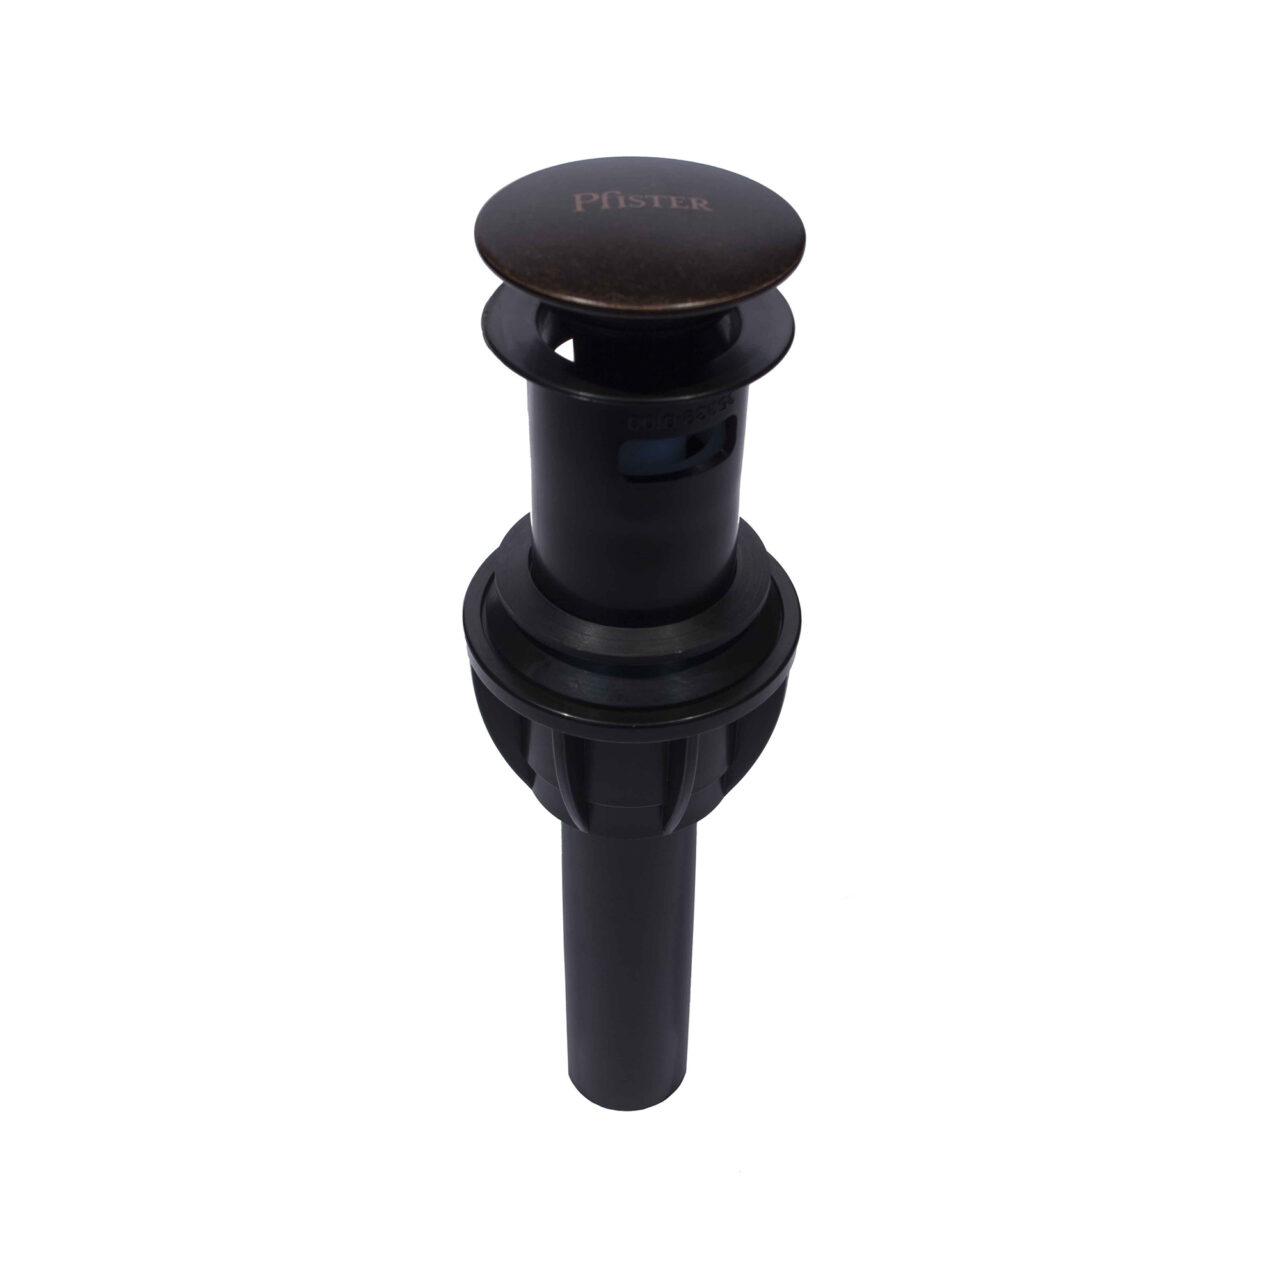
    Pfister® Push & Seal™ Drain

    This procedure will assist you with installing the Pfister Push & Seal Bath Drain.

    You Will Need: No tools required for installation.

    Important: Do not use plumber’s putty. It may damage the seal.

    Download PDF Instructions

    Instructions:

    1. Turn off the water supply and disconnect the plumbing.
    2. Disassemble Pop-Up and save components.
    3. Partially thread drain body to sink.
    4. Connect to drain.
    5. Firmly hand tighten nut.
    6. Push drain head to activate.
    7. Turn on water and confirm proper installation.

    Congratulations, this completes the installation of the Pfister Push & Seal bath drain.

    Get Some Extra Credit For Your Sink

    Register A Product

    Learn About Care & Cleaning

    Our Promise To You

    Get Social With #ShowUsYourSink

    Raise Your Hand:
    We’re Here to Help!

    Installing your new Sinkology product should be a breeze with BILT®, but if you hit a snag, don’t sweat it—we’re here to help! Our team of friendly Sinkologists® is just a call, email, or DM away. Whether you need tips, tricks, or troubleshooting, we’ll get you back on track ASAP.

    Call us at 866.915.3003
    Email us at customerservice@sinkology.com
    Slide into our DMs on social—we’re ready when you are!

    Customer Service

    Contact
    Lifetime Warranty
    Register Your Product

    Resources

    Where To Buy
    Installation
    Cleaning & Care
    #ShowUsYourSink

    instagram    Facebook         

    Accessibility Statement     |     Privacy Policy & Terms     |     Sitemap

    Call a Sinkologist® 866.915.3003

    © 2025 All Rights Reserved
    Close Modal